Spring Boot IntroductionSpring Boot Code StructureSpring boot – beanSpring Boot Dependency Injection(IoC)Spring Boot EventsSpring Boot AOPSpring Boot Api AuthenticationSpring Boot JDBCSpring Boot HibernateSpring Boot Web MVCSpring Boot RestSpringboot – Rest File UploadSpring Boot Migration from SpringSpring Boot Security @Secured on method levelSpring Boot Security ConfigSpring Boot Thread PoolSpringboot MapstructSpringboot CacheSpring Boot TestingSpringboot JMSSpringboot EmailSpringboot with ThymeleafSpringboot with SwaggerSpring Boot – OAuth2Springboot LombokSpring Boot ElasticsearchCode SnippetsSpringBoot Interview QuestionsSpring Boot with Gradle
Spring Boot Table of Content
- Introduction
- Code Structure
- Dependency Injection
- Bean
- Events
- AOP
- JDBC
- Hibernate
- Web MVC
- Springboot Rest
- Springboot Rest File Upload
- Migration from Spring to Springboot
- Spring Security – Authentication
- Spring Security – Secure endpoints or routes by roles
- Spring Security Config
- Spring Boot Thread Pool
- MapStruct
- Cache
- Testing
- JMS
- Swagger
- Mapstruct
- Thymeleaf
- OAuth2
- Lombok
- Gradle
- Elasticsearch
- Code Snippets
- Interview Questions
Spring Boot with Gradle
Gradle is a powerful and flexible build automation system that uses a Groovy-based DSL (Domain Specific Language) or Kotlin-based DSL for defining build tasks. It was designed to overcome the shortcomings of Apache Ant and Apache Maven, and it is widely adopted in the Java community, as well as in Android app development.
Here’s a breakdown of Gradle’s key features and how it works:
- Build Scripts: Gradle uses scripts to define and configure builds. These scripts are typically written in Groovy or Kotlin and are interpreted by Gradle. A common name for a build script file is
build.gradle. - Project and Task Structure: A Gradle build is made up of one or more projects. Each project can have one or more tasks. For example, a task might compile source files, create a JAR file, or generate Javadoc documentation.
- Plugins: Gradle is designed to be extensible, and plugins provide a way to add new functionality. Many plugins are available for Java, Android, and other platforms or tools.
- Dependencies: Like Maven, Gradle has robust dependency management capabilities. You can declare dependencies in your build script, and Gradle will download and cache those dependencies for you.
- Build Lifecycles: Gradle has a lifecycle for its builds which includes phases like initialization, configuration, and execution. During these phases, different actions are performed, like determining which projects are part of the build, determining dependencies, and executing tasks.
- Incremental Builds: Gradle avoids redundant work by only executing tasks that are out-of-date. For instance, if you re-run a build without changing any source files, Gradle recognizes that there’s no need to recompile the source and skips that task.
- Customizability: One of Gradle’s strengths is its flexibility. You can create custom tasks, add custom logic, and modify the build process as needed.
- Wrapper: Gradle provides a wrapper (typically called
gradlewon UNIX-like systems orgradlew.baton Windows). This is a small script that can download and install the correct version of Gradle for a project, ensuring consistent builds across different environments.
How does it work?
- When you run a Gradle command, it starts by evaluating the build script.
- It initializes the build, determining which projects will be built.
- During the configuration phase, all tasks are configured. At this stage, no task is executed; Gradle just determines the dependencies and order in which tasks will run.
- During the execution phase, Gradle runs the necessary tasks in the order determined by their dependencies.
- As tasks run, Gradle checks its cache to avoid redoing work (like recompiling unchanged source files).
- Once all tasks are executed, the build finishes.
Gradle is a versatile tool that can be used not only for Java projects but also for C++, Python, and more. It has integrations with many IDEs (like IntelliJ IDEA and Android Studio) and CI/CD tools, making it a popular choice for modern development environments.
How to run tests using gradle?
in maven -> mvn test
gradle test

or

./gradlew test
How to compile java project using gradle?
in maven -> mvn compile
gradle compileJava

or

./gradlew compileJava
How to package a springboot project using gradle?
in maven -> mvn package
gradle jar

or

./gradlew jar
How to skip tests using gradle?
in maven -> mvn install -DskipTests
gradle assemble -x test

or

./gradlew assemble -x test
How to list dependencies using gradle?
in maven -> mvn dependency:list
gradle dependencies

or

./gradlew dependencies
Including a dependency in a Gradle project with Spring Boot typically involves adding the dependency to the build.gradle file. Here’s a step-by-step process:
Ensure You Have the Spring Boot Gradle Plugin:
First, make sure your build.gradle file applies the Spring Boot Gradle plugin and has the Spring Boot dependencies’ BOM (Bill Of Materials):
plugins {
    id 'org.springframework.boot' version '2.5.4' // Use the appropriate version
    id 'io.spring.dependency-management' version '1.0.11.RELEASE' // Again, ensure the version matches your needs
    id 'java'
}
Include the Spring Boot Repositories (if not already added):
Spring Boot dependencies are available in the Maven Central repository, but if you’re using Spring Milestone or Snapshot releases, you might also need the Spring repositories:
repositories {
    mavenCentral()
    // For milestone releases
    maven { url 'https://repo.spring.io/milestone' }
    // For snapshots
    maven { url 'https://repo.spring.io/snapshot' }
}
Add Your Dependency:
Let’s say you want to include Spring Web to create a web application. You would add:
dependencies {
    implementation 'org.springframework.boot:spring-boot-starter-web'
    // ... your other dependencies
}
Note:
implementationis a configuration indicating that the dependency is required for compiling the source code of the module and is also required at runtime.- The format for the dependency is
'group:artifact:version', but when using the Spring Boot BOM, you often don’t need to specify the version since it’s managed by Spring Boot’s dependency management.
Refresh Your Dependencies:
If you’re using an IDE like IntelliJ IDEA or Eclipse, you might need to refresh your project to download the new dependencies. For command-line builds, the next time you run a Gradle task like ./gradlew bootRun, the dependencies will be fetched automatically.
Additional Tip:
To view all the managed versions and dependencies provided by Spring Boot, you can check the spring-boot-dependencies BOM in the Maven Central repository. It’s a useful reference when you want to know the default versions for various libraries that Spring Boot manages.
Remember, the versions and dependencies might vary based on the specific version of Spring Boot you’re using, so always refer to the official Spring Boot documentation or the Spring Initializr website for accurate information.
SpringBoot Interview Questions
- What is Spring Boot?
– Spring Boot makes it easy to create stand-alone, production-grade Spring-based applications by providing a convention-over-configuration approach.
Spring Boot is a powerful framework designed to simplify the bootstrapping and development of Spring applications. Here are some of its most notable features:- Auto-Configuration: Spring Boot can automatically provide configuration for application functionality common to many Spring applications based on the libraries on the classpath.
- Standalone: Spring Boot applications are stand-alone and web servers can be embedded in the application. This makes it easy to deploy and run Spring Boot applications without needing an external server.
- Production Ready: Spring Boot has built-in features like health checks and metrics, which makes it easy to monitor and manage production applications.
- No Code Generation: Spring Boot does not generate code and there is absolutely zero requirement for XML configuration.
- Opinionated Defaults: Spring Boot gives you a set of default settings, libraries, and configurations so you can get started quickly without needing to figure out what’s the best way to set up a Spring application.
- Spring Boot Initializr: A web-based tool that allows users to easily bootstrap a new Spring Boot application, generating a basic project structure, Maven/Gradle build files, and application properties.
- Embedded Web Server Support: Provides options to have embedded Tomcat, Jetty, or Undertow servers, eliminating the need for external server setups.
- Spring Boot Actuator: Provides production-ready features such as monitoring, metrics, auditing, and more.
- Spring Boot CLI: This command-line tool can be used to run and test Spring Boot applications from a console.
- Flexible Configuration: Spring Boot allows developers to configure their application using a properties file, YAML, environment variables, or command-line arguments.
- Profiles: Enables the separation of parts of the configuration and makes it available only in certain environments, thus allowing for different configuration setups (e.g., dev, test, prod).
- Logging: Provides pre-configured logging via SLF4J and Logback. Developers can also easily switch to other logging solutions if needed.
- Integrated Data Access: Simplified database access and connection pooling with support for a wide range of relational and NoSQL databases.
- Developer Tools: Features like automatic restart of the application upon file changes and browser live-reload capabilities speed up the development process.
- Security: Integration of Spring Security makes it easier to secure web applications and RESTful services.
- Externalized Configuration: Spring Boot provides the ability to externalize and manage application configurations for different environments without modifying the application’s binary.
- Admin Features: Web-based or shell-based admin features for managing and monitoring Spring Boot applications.
- Web Application: Simplified Spring MVC setup with view templates, static web resources, form bindings, and more.
- Extensibility: Spring Boot provides a lot of extensions for building services and other types of web modules.
- Cloud Ready: Easy integration with Spring Cloud, making it a great choice for building microservices and cloud-native applications.
- What are the benefits of using Spring Boot?
– Spring Boot makes it easy to create stand-alone, production-grade Spring applications.
– Spring Boot provides a number of features that make it easier to develop, test, and deploy Spring applications.
– Spring Boot is based on the principle of “convention over configuration,” which means that it provides default configurations and settings that can be overridden as needed.
– Spring Boot has a large community of users and developers, which means that there is a lot of support available. - What are the Spring Boot key components?
- The Spring Boot starter dependencies are a set of Maven dependencies that provide the basic functionality for a Spring Boot application.
- The Spring Boot Actuator is a set of endpoints that provide management and monitoring information about a Spring Boot application.
- The Spring Boot CLI is a command-line tool that can be used to create, run, and manage Spring Boot applications.
- The Spring Boot documentation is a comprehensive resource that provides information on all aspects of Spring Boot.
- Why Spring Boot over Spring?
- Spring Boot is a more lightweight framework than Spring, which makes it easier to learn and use.
- Spring Boot provides a number of features that make it easier to develop, test, and deploy Spring applications.
- Spring Boot is based on the principle of “convention over configuration,” which makes it easier to configure Spring applications.
- Spring Boot has a large community of users and developers, which means that there is a lot of support available.
- What are the basic annotations that Spring Boot offers?
- The @SpringBootApplication annotation is the main annotation that is used to configure a Spring Boot application.
- The @Component annotation is used to mark a class as a Spring component.
- The @Configuration annotation is used to mark a class as a Spring configuration class.
- The @Bean annotation is used to declare a bean in a Spring application.
- The @Autowired annotation is used to inject dependencies into a Spring bean.
- What is Spring Boot dependency management?
- Spring Boot dependency management is a feature that allows you to declare the dependencies that your Spring Boot application needs in the pom.xml file.
- Spring Boot dependency management will automatically download and install the dependencies that your application needs.
- Spring Boot dependency management also provides a number of features that make it easier to manage dependencies, such as version management and dependency conflict resolution.
- Explain what dependency injection is in springboot.
Dependency Injection (DI) is one of the core principles upon which the Spring Framework is built. It is a design pattern that facilitates the inversion of control, which means that objects are given their dependencies rather than creating them internally. This results in a decoupled, modular, and more testable codebase.Explanation:
In a standard application without dependency injection, components and services often create or look up their dependencies. This creates tight coupling between components and makes them harder to test or reuse. With DI, components declare their dependencies (typically via constructor arguments, properties, or annotations), and a container or framework (like Spring) provides those dependencies. This helps in:
- Decoupling: Components are not responsible for finding or creating their dependencies.
- Flexibility: Dependencies can be easily swapped or mocked for testing.
- Configuration Management: Configuration can be centralized, and objects can be wired up with different configurations for different scenarios.
- Life Cycle Management: The framework/container can manage the entire life cycle of beans including their creation, initialization, destruction, and more.
Spring Boot Dependency Injection Examples:
- Constructor-based Injection: Here, dependencies are provided through a class constructor.
@Service
public class OrderService {
    private final UserRepository userRepository;

    @Autowired
    public OrderService(UserRepository userRepository) {
        this.userRepository = userRepository;
    }

    // Other methods
}
Note: In modern Spring versions, if a class has a single constructor, the
@Autowiredannotation can be omitted, and Spring will use that constructor by default. - Setter-based Injection: Dependencies are provided through setters.
@Service public class OrderService { private UserRepository userRepository; @Autowired public void setUserRepository(UserRepository userRepository) { this.userRepository = userRepository; } // Other methods } - Field-based Injection: Directly injecting into fields without setters. This approach is less recommended as it makes the code harder to unit-test without a Spring context.
@Service public class OrderService { @Autowired private UserRepository userRepository; // Other methods } - Qualifier Annotation: When there are multiple beans of the same type and you need to specify which bean to wire, you can use the
@Qualifierannotation.@Service public class OrderService { private final DataSource dataSource; @Autowired public OrderService(@Qualifier("mainDataSource") DataSource dataSource) { this.dataSource = dataSource; } // Other methods }
- Constructor-based Injection: Here, dependencies are provided through a class constructor.
- Explain to me the problem IOC is solving.
Inversion of Control (IoC) is a design principle that addresses the challenges of creating more modular, flexible, and testable software. Before diving into the solution IoC provides, let’s first understand the problem it aims to solve.The Problem:
- Tight Coupling: In traditional application development, objects often create or find their dependencies directly. This tight coupling makes the components hard to reuse, test, and maintain.Example: Imagine a car (
Car) object that creates its own engine (Engine) instance.public class Engine { public void start() { // Start engine } } public class Car { private Engine engine; public Car() { this.engine = new Engine(); } }In the example above, the
Carclass is tightly coupled to a specificEngine. This makes it challenging to replaceEnginewith a different implementation or to mock the engine during testing. - Configuration Sprawl: When instantiating and configuring objects directly within other objects, configuration details can be scattered throughout the application. This can lead to duplication and make the system harder to evolve.
- Lifecycle Management: Objects might have specific lifecycles. Manually managing these lifecycles can become cumbersome, especially in large applications.
How IoC Solves the Problem:
- Decoupling through Dependency Injection: Rather than objects creating their own dependencies, they receive them from an external source (like an IoC container). This is known as Dependency Injection (DI), a form of IoC.Example:
public class Car {
    private Engine engine;

    public Car(Engine engine) {
        this.engine = engine;
    }
}
Here, the
Cardoesn’t create itsEngine. Instead, it’s supplied with an engine. This makes it possible to provide different engine implementations or mock engines for testing. - Centralized Configuration: IoC allows configuration details to be centralized (e.g., in XML files, annotations, or Java configurations). This centralization reduces duplication and provides a single point of truth.Example using Spring:
<!-- Spring XML Configuration --> <bean id="engine" class="com.example.Engine" /> <bean id="car" class="com.example.Car"> <constructor-arg ref="engine"/> </bean> - Managed Lifecycle: An IoC container can manage the lifecycle of objects, from instantiation to destruction. This includes handling singleton/shared instances, initializing beans, and cleaning up resources.Example: With Spring, you can have the IoC container call lifecycle methods:
@Component
public class Engine {

    @PostConstruct
    public void initialize() {
        // Initialization code
    }

    @PreDestroy
    public void cleanup() {
        // Cleanup code
    }
}
In essence, IoC flips the traditional flow of control. Instead of objects controlling their own dependencies, a container or framework takes on the responsibility. This inversion leads to software that’s more modular, easier to test, and more resilient to change.
Here, the
initializemethod is called after theEnginebean is created, andcleanupis called before it’s destroyed.
- Tight Coupling: In traditional application development, objects often create or find their dependencies directly. This tight coupling makes the components hard to reuse, test, and maintain.Example: Imagine a car (
- Explain what IOC containers are in Java Spring Boot.
Inversion of Control (IoC) is a principle where the control flow of a program is inverted: instead of the application code controlling the flow, the external framework or container does. In the context of the Spring Framework, the IoC container is responsible for instantiating, configuring, and assembling objects (known as beans in Spring terminology).Explanation:
The IoC container receives metadata from XML files, annotations, or Java configuration classes, and then uses this metadata to create and manage the lifecycle of the beans. The main tasks of the IoC container are:
- Instantiating the Bean: Creating an object from its definition.
- Wiring the Beans: Connecting beans together, which means setting properties and injecting dependencies.
- Managing the Bean’s Lifecycle: Calling initialization and destruction methods where they’re defined.
- Configuring the Beans: Applying aspects, proxies, and other post-processing features.
There are two primary types of IoC containers in Spring:
- BeanFactory: This is the basic container, providing fundamental support for DI. It’s lightweight and meant for simple use-cases.
- ApplicationContext: This is a more advanced container, built on top of
BeanFactory. It provides additional features such as event propagation, declarative mechanisms to create a bean, integration with AOP (Aspect-Oriented Programming), and more. In most Spring-based applications (including Spring Boot apps),ApplicationContextis used more often thanBeanFactory.
Spring Boot and IoC Container:
Spring Boot simplifies the use of the IoC container by eliminating most of the boilerplate configuration. With features like auto-configuration and component scanning, Spring Boot makes it easier to create, wire, and manage beans with minimal explicit configuration.
Examples:
- Creating a Bean using Annotations:
@Component public class HelloWorld { public String sayHello() { return "Hello, World!"; } } - Injecting a Dependency using Autowiring:
@Service public class MessageService { private final HelloWorld helloWorld; @Autowired public MessageService(HelloWorld helloWorld) { this.helloWorld = helloWorld; } public void showMessage() { System.out.println(helloWorld.sayHello()); } } - Using ApplicationContext in a Spring Boot Application:
@SpringBootApplication
public class MyApp {
    public static void main(String[] args) {
        ApplicationContext context = SpringApplication.run(MyApp.class, args);
        MessageService messageService = context.getBean(MessageService.class);
        messageService.showMessage();
    }
}
- Can we create a non-web application in Spring Boot?
- Yes, you can create a non-web application in Spring Boot.
- To do this, you need to exclude the web dependency from the pom.xml file.
- You can also use the @SpringBootApplication annotation with the annotation attribute set to ‘false’.
- Is it possible to change the port of the embedded Tomcat server in Spring Boot?
- Yes, it is possible to change the port of the embedded Tomcat server in Spring Boot.
- To do this, you need to set the server.port property in the application.properties file.
- For example, to set the port to 8081, you would set the server.port property to 8081.
- What is the default port of tomcat in spring boot?
- The default port of tomcat in spring boot is 8080.
- This means that if you do not specify a port in the application.properties file, the embedded Tomcat server will listen on port 8080.
- What are the different ways to configure Spring Boot?
- There are three main ways to configure Spring Boot:
- Using the application.properties file
- Using the @Configuration class
- Using the Spring Boot CLI
- There are three main ways to configure Spring Boot:
- What are the different ways to run a Spring Boot application?
- There are three main ways to run a Spring Boot application:
- Running the application as a Java application
- Running the application as a Spring Boot JAR file
- Running the application as a Docker container
- There are three main ways to run a Spring Boot application:
- What are the different ways to test a Spring Boot application?
- There are three main ways to test a Spring Boot application:
- Unit testing
- Integration testing
- End-to-end testing
- There are three main ways to test a Spring Boot application:
- How is Spring Boot different from Spring MVC?
Spring Boot is a framework built on top of Spring to simplify its setup and usage, whereas Spring MVC is a web framework in the Spring ecosystem. - What are Spring Boot starters?
Starters are templates that contain a collection of all the relevant transitive dependencies a user needs to start a specific kind of project. - What’s the advantage of Spring Boot’s “Opinionated Defaults”?
They reduce the developer’s effort in decision-making and configuration. - Explain Spring Boot’s
@SpringBootApplicationannotation?
It’s a combination of@Configuration,@EnableAutoConfiguration, and@ComponentScan. - How do you customize Spring Boot’s banner?
By creating abanner.txtfile in thesrc/main/resourcesdirectory or setting abanner.locationproperty. - How does Spring Boot handle properties/env variables?
Using@Valueannotation or by injecting theEnvironmentobject.
Spring Boot provides a comprehensive and flexible way to handle properties. The framework offers several layers of property sources and conventions that make configuration easy and intuitive. Here’s a detailed breakdown of how Spring Boot handles properties:- Externalized Configuration: Spring Boot allows you to externalize your configuration so that you can work with the same application code in different environments. You can use properties files, YAML files, environment variables, and command-line arguments, among others, to externalize configuration.
application.propertiesandapplication.yml:- Spring Boot looks for these files at the root of the classpath (like in
src/main/resources). - These files can be used to define default properties.
- Spring Boot looks for these files at the root of the classpath (like in
- Profile-specific Properties:
- Spring Boot lets you define properties specific to a profile (e.g.,
application-dev.propertiesfor adevprofile). - These properties are only activated when the corresponding profile is active.
- Spring Boot lets you define properties specific to a profile (e.g.,
- Property Precedence:
- Properties defined can be overridden. For instance, properties passed as command-line arguments override those defined in
application.properties - Spring Boot has a specific order in which it considers property values, ranging from command-line arguments (highest precedence) to
application.propertiesorapplication.ymlin the jar (lowest precedence).
- Properties defined can be overridden. For instance, properties passed as command-line arguments override those defined in
- Environment Properties:
- Environment variables can also be used as properties. For example, a variable named
SPRING_DATASOURCE_URLwould map to thespring.datasource.urlproperty in the application.
- Environment variables can also be used as properties. For example, a variable named
- Using the
@ValueAnnotation:- You can bind properties directly to fields in your beans using the
@Value("${property.name}")annotation.@Value("${custom.property}") private String customProperty;
- You can bind properties directly to fields in your beans using the
- Type-safe Configuration (Configuration Properties):
- Instead of using the
@Valueannotation, you can bind properties to POJOs annotated with@ConfigurationProperties. This method is type-safe and offers additional benefits like validation and code-completion in IDEs.@ConfigurationProperties(prefix="custom") public class CustomProperties { private String property; // getters and setters }
- Instead of using the
- Placeholder Resolution:
- Spring Boot can replace placeholders in properties and other parts of your configuration (e.g.,
${another.property}).
- Spring Boot can replace placeholders in properties and other parts of your configuration (e.g.,
- Relaxed Binding:
- Spring Boot uses a “relaxed” strategy for binding property names, so
spring.datasource.url,spring.datasource-url,SPRING_DATASOURCE_URL, andspring.datasource_urlwould all match thespring.datasource.urlproperty.
- Spring Boot uses a “relaxed” strategy for binding property names, so
- What is YAML? How is it related to Spring Boot?
YAML is a human-readable data format. Spring Boot supports YAML for property configuration. - Describe Profiles in Spring Boot.
In Spring Boot, profiles provide a way to segregate parts of your application’s configuration and make it available only in certain environments. It’s a core feature of the Spring framework that has been deeply integrated into Spring Boot, allowing developers to easily manage environment-specific properties and beans.Here’s a detailed description of profiles in Spring Boot:- Purpose:
- Profiles are used when you want to apply specific configuration settings only in a specific environment. For instance, you might have different data sources for development and production or you might want to enable certain features only in the development environment.
- Activation:
- Profiles can be activated in various ways:
- Through the
spring.profiles.activeproperty (e.g., inapplication.propertiesor as a command-line argument). - Setting the
SPRING_PROFILES_ACTIVEenvironment variable. - Using the
SpringApplication.setAdditionalProfiles(...)method programmatically.
- Through the
- Profiles can be activated in various ways:
- Profile-specific Configuration Files:
- You can define properties specific to a profile in separate configuration files. For example,
application-dev.propertieswill only be applied when thedevprofile is active. - Similarly, for YAML files, you could use
application-dev.yml.
- You can define properties specific to a profile in separate configuration files. For example,
- Defining Beans Conditionally:
- You can define Spring beans that are conditionally created based on which profiles are active using the
@Profileannotation:@Profile("dev") @Bean public DataSource dataSource() { return new EmbeddedDatabaseBuilder().build(); }
- You can define Spring beans that are conditionally created based on which profiles are active using the
- Multiple Profiles:
- Multiple profiles can be active at once. This allows you to compose configurations from multiple sources.
- For example, you might have a
cloudprofile that’s used for any cloud provider and aawsprofile that’s specific to AWS. You can activate both profiles simultaneously.
- Default Profiles:
- If no profiles are explicitly activated, the
defaultprofile will be used. - This can be useful to apply certain configurations when no other profiles are active.
- If no profiles are explicitly activated, the
- Profile-specific Logging:
- Log configurations can be profile-specific as well. For instance, you might want more detailed logging in a development environment compared to production.
- Negating Profiles:
- You can define beans that are created when a profile is not active using the “!” notation:
@Profile("!prod")
@Bean
public DataSource dataSource() {
    // This bean will be created when the 'prod' profile is NOT active
}
- You can define beans that are created when a profile is not active using the “!” notation:
- Application Arguments:
- Profiles can be activated via command-line arguments when running the Spring Boot application. For instance:
java -jar myapp.jar --spring.profiles.active=prod
- Profiles can be activated via command-line arguments when running the Spring Boot application. For instance:
- Purpose:
- How do you activate a Spring profile?
Usingspring.profiles.activeproperty. - What is Spring Boot Actuator?
It provides production-ready features to monitor and manage a Spring Boot application. - Mention a few Actuator endpoints.
/health,/info,/metrics,/env. - How does Spring Boot handle database migrations?
Using tools like Flyway or Liquibase. - What’s the use of
@EntityScan?
It’s used to specify the base packages where JPA will scan for entities. - How can you run a Spring Boot application?
Using theSpringApplication.run()method. - How can you customize Spring Boot’s embedded servers?
By modifyingserver.*properties (e.g.,server.port). - Describe Spring Boot’s Data JPA starter.
It provides key dependencies for Hibernate, Spring Data, and JPA. - What’s the use of
@RepositoryRestResource?
It exposes JPA entities directly as REST endpoints. - How does Spring Boot handle AOP?
By using Spring AOP andspring-boot-starter-aop. - What are Spring Boot’s initializers?
They provide a web-based UI to generate Spring Boot projects. - How can you override default properties in Spring Boot?
By specifying them inapplication.propertiesorapplication.yml. - How does Spring Boot support microservices?
With Spring Cloud, which provides tools to build microservice architectures. - Explain Spring Boot’s
@RestControllervs@Controller.
@RestControlleris a shorthand for@Controller+@ResponseBody. - How to enable transaction management in Spring Boot?
With@EnableTransactionManagementand by using@Transactionalon methods. - How to handle exceptions in Spring Boot?
Using@ControllerAdviceand@ExceptionHandler. - Explain the Spring Boot testing support.
It supports JUnit and providesspring-boot-starter-testwith utilities likeMockMvc. - How can you produce a standalone Java application using Spring Boot?
By packaging the app as a jar with embedded Tomcat, Jetty, or Undertow. - What are Spring Boot build plugins?
They help in packaging executable jars/wars, e.g.,spring-boot-maven-plugin. - How to exclude a particular package from Component Scan?
With@ComponentScan(excludeFilters = @Filter). - How can you modify the default location of
application.properties?
Usingspring.config.locationproperty. - Explain embedded servers in Spring Boot.
Spring Boot supports Tomcat, Jetty, and Undertow as embedded servers, which means applications can run as standalone apps. - How can you change the default port in Spring Boot?
By settingserver.portinapplication.properties. - Describe Spring Boot’s
@Conditional
It indicates a component is only eligible for registration when a specific condition matches. - What is the use of
@SpringBootTest?
- It signals that the context should be a
SpringApplicationand loads all registered beans. @SpringBootTestis an annotation provided by Spring Boot that is used for integration testing. It helps to bootstrap the entire container (depending on the provided configuration), so you can test the application in scenarios close to the actual use.Features of@SpringBootTest:- Autoconfigure Spring Boot Application: It automatically configures your application based on the provided configuration and starts the application context.
- Web Environment: You can specify the type of web environment to use (e.g., MOCK, RANDOM_PORT, DEFINED_PORT, or NONE).
- Properties: You can define or override properties for the test environment.
Examples of using
@SpringBootTest:- Basic Usage:
@SpringBootTest
class MyApplicationTests {

    @Test
    void contextLoads() {
    }
}
This test ensures that the application context loads without any issues.
- Using a Random Port: If your application starts a web server, you can start it on a random port to avoid port conflicts during testing:
@SpringBootTest(webEnvironment = SpringBootTest.WebEnvironment.RANDOM_PORT) class MyWebApplicationTests { @Autowired TestRestTemplate restTemplate; @Test void testHomeEndpoint() { String response = restTemplate.getForObject("/", String.class); assertEquals("Hello World", response); } } - Using a Mock Web Environment: For web applications, you may want to avoid starting a server altogether and just use the mock servlet environment:
@SpringBootTest(webEnvironment = SpringBootTest.WebEnvironment.MOCK) class MyWebMockTest { @Autowired MockMvc mockMvc; @Test void testEndpoint() throws Exception { mockMvc.perform(MockMvcRequestBuilders.get("/")) .andExpect(status().isOk()) .andExpect(content().string("Hello World")); } } - Overriding Properties: You can override properties for specific test scenarios:
@SpringBootTest(properties = {"custom.property=value"}) class PropertyOverrideTest { //... } - Using with
@ActiveProfiles: To activate certain profiles during testing, you can combine it with@ActiveProfiles:@SpringBootTest @ActiveProfiles("test") class MyProfileTest { //... }The
@SpringBootTestannotation simplifies integration testing for Spring Boot applications by setting up and tearing down the application context and providing various utilities and configurations specific to the testing phase.
35. How can you serve static content in Spring Boot?
- By placing it in the
/public,/resources,/static, or/META-INF/resourcesdirectories.
In Spring Boot, serving static content is straightforward and requires minimal configuration due to its opinionated defaults. Here’s how you can serve static content in a Spring Boot application:1. Default Static Content Locations:
By default, Spring Boot serves static content from the following locations inside your project:
/META-INF/resources//resources//static//public/
For instance, if you place an
index.htmlfile inside thesrc/main/resources/static/directory of your Spring Boot application, you can access it by visitinghttp://localhost:8080/index.htmlafter starting your application.2. Custom Static Content Locations:
If you want to customize the static content locations, you can do so by configuring the
spring.resources.static-locationsproperty. For example, to serve static content from acustom-dirdirectory:spring.resources.static-locations=classpath:/custom-dir/
36. Describe the hierarchy of application.properties in Spring Boot.
@TestPropertySource,@SpringBootTest.properties, and inside the JAR are examples of levels.In Spring Boot, the
application.properties(or its YAML counterpart,application.yml) file is the primary means for configuring application settings. Spring Boot provides a flexible system of looking for this configuration file in various locations and offers a hierarchy that determines the order of precedence for reading these configurations.Here’s the hierarchy for
application.propertieslocations, starting from the highest precedence:- Command Line Parameters:
- Properties passed as command-line arguments, e.g.,
java -jar app.jar --server.port=8081
- Properties passed as command-line arguments, e.g.,
- Properties from
SPRING_APPLICATION_JSON:- Properties can be passed as a JSON string via the
SPRING_APPLICATION_JSONenvironment variable.
- Properties can be passed as a JSON string via the
- Java System Properties:
- Properties set using
-Dargument, e.g.,java -Dserver.port=8081 -jar app.jar
- Properties set using
- OS Environment Variables:
- Operating System specific environment variables. For example, a property named
server.portcan be sourced from an environment variable namedSERVER_PORT.
- Operating System specific environment variables. For example, a property named
- Configuration files outside the packaged jar:
- A
application.propertiesorapplication.ymllocated in the same directory from which the application is run. - Or in a
./configsub-directory of the directory from which the application is run.
- A
- Configuration files inside the packaged jar:
- A
application.propertiesorapplication.ymlat the root of the classpath, typically inside thesrc/main/resourcesdirectory. - Or in a
/configpackage or directory inside the jar.
- A
- Configuration properties on the classpath:
- A
application.propertiesorapplication.ymllocated in the classpath root.
- A
- Default properties:
- Properties set using
SpringApplication.setDefaultProperties.
- Properties set using
Profile-specific properties:
Along with the above, Spring Boot allows for profile-specific property files. These are named like
application-{profile}.propertiesorapplication-{profile}.yml. Profile-specific property files have precedence over the defaultapplication.propertiesorapplication.ymlbut are ordered by the same precedence rules mentioned above.For example, if a
devprofile is active,application-dev.propertiesoutside the jar will override theapplication.propertiesoutside the jar, but both will be overridden by any value passed as a command-line argument.Conclusion: The hierarchy and the ability to source configurations from various locations allow for a high degree of flexibility. You can have default settings packaged within your application and override them for different environments using external files or even command-line arguments. This makes it easier to manage configurations across different deployment scenarios without changing the packaged application.
- Command Line Parameters:
37. What is a Spring Boot Fat JAR?
- A JAR that contains embedded dependencies, including the server.
38. What are the main advantages of using Spring Boot?
- Rapid development, production-ready setups, convention over configuration, and no code generation.
39. How do you enable debug logging in Spring Boot?
- Set
logging.level.root=DEBUGinapplication.properties.
40. Explain the importance of the pom.xml file in Spring Boot.
- It defines project metadata, dependencies, and build plugins for Maven-based projects.
41. What’s the purpose of @EnableAutoConfiguration?
- It enables automatic configuration based on libraries present in the classpath.
42. How does Spring Boot simplify database connectivity?
- With auto-configured data sources and
spring-boot-starter-data-jpa.
Spring Boot significantly simplifies database connectivity by providing a number of automated configurations, sensible defaults, and integration with popular Java database tools and libraries. Here’s how Spring Boot aids in easing database connectivity:- Auto-configuration:
- When you add a database-related dependency (like an embedded database or a JPA implementation), Spring Boot attempts to set up a database connection based on the libraries present in the classpath.
- Data Source Configuration:
- Spring Boot can provide a lot of database configuration automatically, based on the properties defined in the
application.propertiesorapplication.ymlfiles. - For instance, just by defining properties like
spring.datasource.url,spring.datasource.username, andspring.datasource.password, you can configure a data source without any manual bean definitions.spring.datasource.url=jdbc:mysql://localhost:3306/mydb spring.datasource.username=root spring.datasource.password=secret
- Spring Boot can provide a lot of database configuration automatically, based on the properties defined in the
- Embedded Databases:
- Spring Boot provides out-of-the-box support for H2, HSQL, and Derby embedded databases. When any of these is on the classpath, Spring Boot automatically sets up an embedded database for you.
- Connection Pooling:
- Connection pooling libraries like HikariCP, Tomcat, and DBCP2 are automatically configured when they’re on the classpath.
- By default, if HikariCP is on the classpath, it’s chosen as the primary connection pool due to its performance and concurrency benefits.
spring.datasource.hikari.maximum-pool-size=10
- JPA & Spring Data JPA:
- By including the Spring Data JPA starter, Spring Boot auto-configures Hibernate as the default JPA provider.
- With minimal properties set, Spring Boot sets up Hibernate, scans entities, and sets up a default
EntityManager.
- Repository Support:
- With Spring Data JPA, you can create interfaces extending
CrudRepositoryorJpaRepositoryand Spring Boot automatically provides the implementation at runtime, enabling CRUD operations on entities without writing the boilerplate code.
- With Spring Data JPA, you can create interfaces extending
- Database Initialization:
- Spring Boot can auto-detect SQL scripts (like
schema.sqlanddata.sql) and run them at startup to initialize the database. - It also supports using tools like Flyway or Liquibase for database version control and migration by simply including their dependencies and configuration.
- Description: Spring Boot can automatically run SQL scripts on startup for database initialization.
- Example: If you place a file named
schema.sqlin thesrc/main/resourcesdirectory, Spring Boot will execute it on startup.schema.sql:
- Spring Boot can auto-detect SQL scripts (like
- Profile-based Configuration:
- Different
application-{profile}.propertiesfiles can be used for different environments. This means you can have separate configurations for development, staging, and production, making it easy to switch between databases based on the active profile.
- Different
- JDBC Template:
- If you’re using plain JDBC, Spring Boot provides auto-configuration for the
JdbcTemplate, making it easier to interact with relational databases without managing connections and exceptions manually.@Autowired JdbcTemplate jdbcTemplate; public int getCountOfBooks() { return jdbcTemplate.queryForObject("SELECT COUNT(*) FROM book", Integer.class); }
- If you’re using plain JDBC, Spring Boot provides auto-configuration for the
- Metrics & Health Indicators:
- When used with Spring Boot Actuator, it provides metrics and health checks related to database connectivity, helping in monitoring and managing the application in production environments.
- Exception Translation:
- Spring Boot integrates the persistence exception translation mechanism of Spring, which translates lower-level SQL and database exceptions into Spring’s
DataAccessException, making it easier to handle database-related errors in a consistent way.In essence, Spring Boot removes much of the boilerplate code traditionally associated with setting up and managing database connections in a Spring application. This allows developers to focus on their domain logic rather than the intricacies of database setup and connectivity.
- Spring Boot integrates the persistence exception translation mechanism of Spring, which translates lower-level SQL and database exceptions into Spring’s
- Auto-configuration:
43. What is the importance of @Repository in Spring Boot?
- Marks the class as a DAO, throws specific exceptions, and can be scanned by Spring.
44. How can you specify the active profile while running a Spring Boot application?
- Using
--spring.profiles.active=myprofileduring startup.
45. How can you secure a Spring Boot application?
- With
spring-boot-starter-securityand@EnableWebSecurity.
Securing a Spring Boot application is made simpler with the integration of Spring Security. Spring Security provides a comprehensive security solution for Java applications, handling authentication, authorization, and other security concerns. Here’s how you can secure a Spring Boot application, along with illustrative examples:1. Add Spring Security Dependency:
First and foremost, you’ll need to add the Spring Security starter to your
pom.xml(if using Maven):<dependency> <groupId>org.springframework.boot</groupId> <artifactId>spring-boot-starter-security</artifactId> </dependency> -
Basic Authentication:
By merely including the above dependency, Spring Boot will set up basic authentication for all routes with a default user named “user” and a generated password that’s displayed in the console on startup.
Example: Accessing any endpoint without authentication will return a
401 Unauthorized. Use the provided username and password in the request header or when prompted by the browser to authenticate.3. Configure Custom User Details:
You can configure user details and their roles in memory or retrieve them from a database.
Example – In-memory Authentication:
@Configuration
public class SecurityConfig extends WebSecurityConfigurerAdapter {

    @Override
    protected void configure(AuthenticationManagerBuilder auth) throws Exception {
        auth.inMemoryAuthentication()
            .withUser("admin").password("{noop}admin123").roles("ADMIN")
            .and()
            .withUser("user").password("{noop}user123").roles("USER");
    }
}
Authorize Requests:
You can specify which routes or endpoints are accessible by which roles.
@Override
protected void configure(HttpSecurity http) throws Exception {
    http.authorizeRequests()
        .antMatchers("/admin/**").hasRole("ADMIN")
        .antMatchers("/user/**").hasAnyRole("ADMIN", "USER")
        .antMatchers("/").permitAll()
        .and().formLogin();
}
46. What is a CommandLineRunner in Spring Boot?
- It lets you run specific code once the application context is fully started.
47. Describe the structure of a typical Spring Boot project.
- It follows the Maven/Gradle directory structure, with main application code in
src/main/javaand resources insrc/main/resources.
48. How can you customize the Jackson ObjectMapper in Spring Boot?
- By defining a
@Beanof typeObjectMapperin a configuration class.
49. What are the benefits of using the Spring Boot DevTools?
- Automatic restart, live reload, and developer-friendly properties.
50. What is spring-boot-starter-parent?
- It’s a parent POM providing dependency and plugin management for Spring Boot applications.
Springboot Retry
Spring framework has a retry project that is very useful when you have a business logic failure that you want to be able to retry to complete.
<dependency>
    <groupId>org.springframework.retry</groupId>
    <artifactId>spring-retry</artifactId>
</dependency>
<dependency>
    <groupId>org.springframework.boot</groupId>
    <artifactId>spring-boot-starter-aop</artifactId>
</dependency>
@Configuration
@EnableRetry
public class GlobalConfig {

}
@Service
@Slf4j
public class UserServiceImp implements UserService {

    @Retryable(value = {RuntimeException.class}, maxAttempts = 3, backoff = @Backoff(delay = 2000))
    @Override
    public boolean sendEmail(User user) throws RuntimeException {
        log.info("send email");
        if (true) {
            throw new RuntimeException("error");
        }

        return false;
    }

    @Recover
    @Override
    public boolean recover(RuntimeException e, User user) {
        log.info("recover");
        return true;
    }

}
Springboot Lombok
Project Lombok is a java library that automatically plugs into your editor and build tools, spicing up your java.
Never write another getter or equals method again, with one annotation your class has a fully featured builder, Automate your logging variables, and much more.
Java can get too verbose for things you have to do such as generating getter and setter methods. These things often bring no real value to the business side of your applications. This is what lombok is for. Lombok is here to help you generate boilerplate code and you focus on business logic. The way it works is by plugging into your build process and autogenerating Java bytecode into your .class files as per a number of project annotations you introduce in your code.
Install Lombok on your computer
- Add dependency
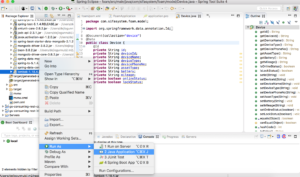
<dependency> <groupId>org.projectlombok</groupId> <artifactId>lombok</artifactId> <optional>true</optional> </dependency> - Find lombok.jar in your project maven directory -> Right click -> Run As -> Java Application
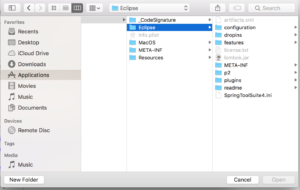
- Click on Specify Location button to choose the path where STS is installed
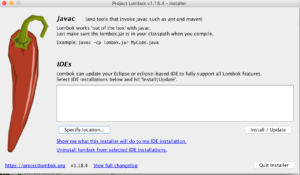
- Go to Application/Contents/Eclipse/SpringToolSuit4.ini Then click on Install -> Quick Installer
- Restart STS you are good to go
Use Lombok in your project
import java.io.Serializable;
import java.util.Date;
import java.util.HashSet;
import java.util.List;
import java.util.Set;
import java.util.UUID;
import java.util.stream.Collectors;

import javax.persistence.CascadeType;
import javax.persistence.Column;
import javax.persistence.Entity;
import javax.persistence.EnumType;
import javax.persistence.Enumerated;
import javax.persistence.FetchType;
import javax.persistence.GeneratedValue;
import javax.persistence.GenerationType;
import javax.persistence.Id;
import javax.persistence.Index;
import javax.persistence.JoinColumn;
import javax.persistence.JoinTable;
import javax.persistence.Lob;
import javax.persistence.ManyToMany;
import javax.persistence.OneToOne;
import javax.persistence.PrePersist;
import javax.persistence.PreUpdate;
import javax.persistence.Table;
import javax.persistence.Temporal;
import javax.persistence.TemporalType;
import javax.validation.constraints.NotEmpty;
import org.hibernate.annotations.CreationTimestamp;
import org.hibernate.annotations.ResultCheckStyle;
import org.hibernate.annotations.SQLDelete;
import org.hibernate.annotations.Type;
import org.hibernate.annotations.UpdateTimestamp;
import org.hibernate.annotations.Where;

import com.fasterxml.jackson.annotation.JsonIgnoreProperties;
import com.fasterxml.jackson.annotation.JsonInclude;
import com.fasterxml.jackson.annotation.JsonInclude.Include;
import com.social.api.address.Address;
import com.social.api.user.role.Role;

import lombok.AllArgsConstructor;
import lombok.Getter;
import lombok.NoArgsConstructor;
import lombok.Setter;
import lombok.ToString;

@Setter
@Getter
@ToString
@AllArgsConstructor
@NoArgsConstructor
@JsonInclude(value = Include.NON_NULL)
public class User implements Serializable {

    private static final long serialVersionUID       = 1L;

    private Long              id;

    private String            firstName;

    private String            lastName;

    private String            email;

    private String            password;

    private String            phoneNumber;

    private Date              dateOfBirth;

    private String            aboutMe;

    private String            profileImageUrl;

    private String            coverImageUrl;

    private Date              passwordExpirationDate;

    private Integer           invalidPasswordCounter = 0;


}
Spring Boot – OAuth2
Create auth server and resource server
Create auth client that consumes resource from a third party like Google or Github