Introduction
What is react native?
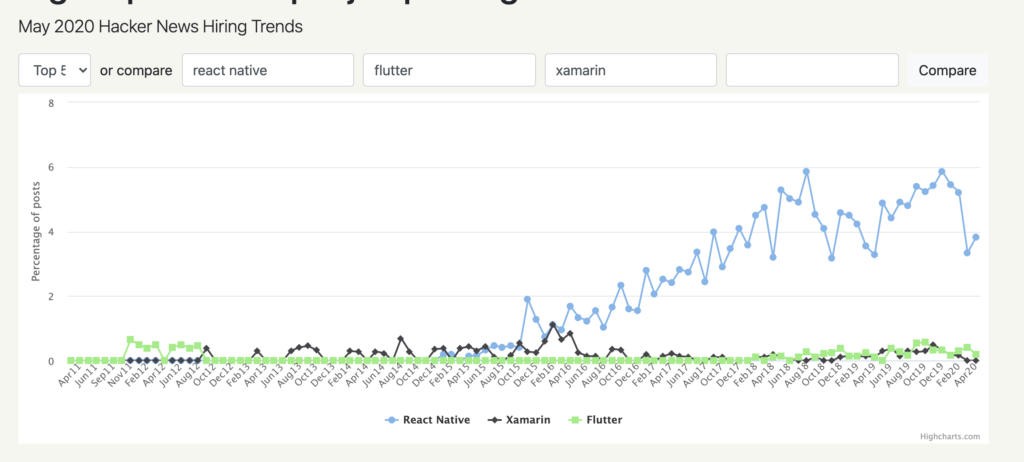 Why react native?
Spring Data – Save
First you will have to create an interface and extend JPARepository to inherit its save and saveAndFlush methods.
Note – JpaRepository interface extends PagingAndSortingRepository interface which further extends CrudRepository. CrudRepository extends Repository interface.
public interface UserRepository extends JpaRepository<User, Long> {
}
@Data
@AllArgsConstructor
@NoArgsConstructor
@JsonInclude(value = Include.NON_NULL)
@Entity
@Table(name = "user")
public class User implements Serializable {

    private static final long serialVersionUID = 1L;

    @Id
    @GeneratedValue(strategy = GenerationType.IDENTITY)
    @Column(name = "id", nullable = false, updatable = false, unique = true)
    private Long              id;

    @Column(name = "first_name")
    private String            firstName;

    @Column(name = "last_name")
    private String            lastName;

    @Column(name = "email")
    private String            email;

    @Column(name = "phone_number")
    private String            phoneNumber;

    @Column(name = "gender")
    private String            gender;

    @Column(name = "date_of_birth")
    private LocalDate         dateOfBirth;

    @Column(name = "deleted")
    @org.hibernate.annotations.Type(type = "true_false")
    private boolean           deleted;

    public User(Long id) {
        this.id = id;
    }
}
Hibernate holds the persistable state of an entity in memory. The process of synchronizing or pushing this state to the underlying DB is called flushing.
When we use the save() method, the data associated with the save operation will not be flushed to the DB right away unless and until an explicit call to flush() or commit() method is made.
One thing we have to keep in mind here is that, if we decide to flush the data by ourselves without committing it, then the changes won’t be visible to the outside transaction unless a commit call is made in this transaction or the isolation level of the outside transaction is READ_UNCOMMITTED.
The saveAndFlush() method flushes the data immediately during the execution. Normally, we use this method when our business logic needs to read the saved changes at a later point during the same transaction but before the commit.
In your persistence layer you can then use the saveAndFlush method to save data into the database.
User user = new User();
user.setDateOfBirth(LocalDate.now().minusYears(20));
user.setEmail("folaudev@gmail.com");
user.setFirstName("Folau");
user.setLastName("Kaveinga");
user.setGender("MALE");
user.setPhoneNumber("3101234567");

user = userRepository.saveAndFlush(user);
Spring Data Update
Updating an entity with the JPARepository requires 2 trips to the database. First, you need to fetch the database record, update it with your new values. Then second, you will need to update the database record. This is very simple to do using JPARepository.
@Data
@AllArgsConstructor
@NoArgsConstructor
@JsonInclude(value = Include.NON_NULL)
@Entity
@Table(name = "user")
public class User implements Serializable {

    private static final long serialVersionUID = 1L;

    @Id
    @GeneratedValue(strategy = GenerationType.IDENTITY)
    @Column(name = "id", nullable = false, updatable = false, unique = true)
    private Long id;

    @Column(name = "first_name")
    private String firstName;

    @Column(name = "last_name")
    private String lastName;

    @Column(name = "email")
    private String email;

    @Column(name = "phone_number")
    private String phoneNumber;

    @Column(name = "gender")
    private String gender;

    @Column(name = "date_of_birth")
    private LocalDate dateOfBirth;

    public User(Long id) {
        this.id = id;
    }


}
public interface UserRepository extends JpaRepository<User, Long>{

}
Use JpaRepository.saveAndFlush() method
The JpaRepository.saveAndFlush() method can be used to create or update and entity in the database. If the entity id(@Id) is null or the id specified is not found in the table then JPA will create a new record with a new id. If id is not null and is found in the table then JPA will update the table record with new values passing in.
@Service
@Slf4j
public class UserService {

    @Autowired
    private UserRepository userRepository;

    public User signUp(User user) {
        log.info("signup...");
        return userRepository.saveAndFlush(user);
    }
}
Use @Modifying and @Transactional
There is a way to avoid the 2 trips to the database which can be expensive at times especially if your entity has other entities within it. You can image that loading an entity of that kind will be expensive due to JPA having to load child entities. To do this, you use @Modifying and @Transactional.
public interface UserRepository extends JpaRepository<User, Long> {

    @Modifying
    @Transactional
    @Query("update User u set u.deleted = true where u.id = :id")
    Integer softDeleteById(@Param("id") Long id);
}
Class Photos
It’s photo day at the local school, and you’re the photographer assigned to take class photos. The class that you’ll be photographing has an even number of students, and all these students are wearing red or blue shirts. In fact, exactly half of the class is wearing red shirts, and the other half is wearing blue shirts. You’re responsible for arranging the students in two rows before taking the photo. Each row should contain the same number of the students and should adhere to the following guidelines:
- All students wearing red shirts must be in the same row.
- All students wearing blue shirts must be in the same row.
- Each student in the back row must be strictly taller than the student directly in front of them in the front row.
You’re given two input arrays: one containing the heights of all the students with red shirts and another one containing the heights of all the students with blue shirts. These arrays will always have the same length, and each height will be a positive integer. Write a function that returns whether or not a class photo that follows the stated guidelines can be taken.
Note: you can assume that each class has at least 2 students.
Sample Input
redShirtHeights=[5, 8, 1, 3, 4]
blueShirtHeights=[6, 9, 2, 4, 5]
Sample Output
true
Solution
- Sort lists in reversed order
- Find which row goes in the back and which row goes in the front by comparing the tallest height of red and blue lists
- Loop through both lists and compare height for each position
- Return false if a position in the front row is taller than a position in the back row, else return true
Time Complexity: O(n log n)
Space Complexity: O(1)
Algorithm used: Greedy Algorithm
static boolean canTakeClassPhotos(List<Integer> redShirtHeights, List<Integer> blueShirtHeights) {
    Collections.sort(redShirtHeights, Collections.reverseOrder());
    Collections.sort(blueShirtHeights, Collections.reverseOrder());

    System.out.println("redShirtHeights: " + redShirtHeights);
    System.out.println("blueShirtHeights: " + blueShirtHeights);

    boolean canTakePhoto = true;

    String frontRowColor = (redShirtHeights.get(0) < blueShirtHeights.get(0)) ? "RED" : "BLUE";

    System.out.println("frontRowColor: " + frontRowColor);

    for (int i = 0; i < redShirtHeights.size(); i++) {
        int redShirtHeight = redShirtHeights.get(i);// front row
        int blueShirtHeight = blueShirtHeights.get(i);// back row

        if (frontRowColor.equals("RED")) {

            if (redShirtHeight >= blueShirtHeight) {
                canTakePhoto = false;
                break;
            }

        } else if (frontRowColor.equals("BLUE")) {
            if (redShirtHeight <= blueShirtHeight) {
                canTakePhoto = false;
                break;
            }
        }
    }

    System.out.println("canTakePhoto: " + canTakePhoto + "\n\n");

    return canTakePhoto;
}
List<Integer> redShirtHeights = Arrays.asList(5, 8, 1, 3, 4);
List<Integer> blueShirtHeights = Arrays.asList(6, 9, 2, 4, 5);

canTakeClassPhotos(redShirtHeights, blueShirtHeights);// true

redShirtHeights = Arrays.asList(6, 9, 2, 4, 5);
blueShirtHeights = Arrays.asList(5, 8, 1, 3, 4);

canTakeClassPhotos(redShirtHeights, blueShirtHeights);// true

redShirtHeights = Arrays.asList(6, 9, 2, 4, 5, 1);
blueShirtHeights = Arrays.asList(5, 8, 1, 3, 4, 9);

canTakeClassPhotos(redShirtHeights, blueShirtHeights);// false

redShirtHeights = Arrays.asList(6);
blueShirtHeights = Arrays.asList(6);

canTakeClassPhotos(redShirtHeights, blueShirtHeights);// false
Javascript Debugging
Programming code might contain syntax errors, or logical errors. Many of these errors are difficult to diagnose. Often, when programming code contains errors, nothing will happen. There are no error messages, and you will get no indications where to search for errors. Searching for (and fixing) errors in programming code is called code debugging.
Debugging is the process of testing, finding, and reducing bugs (errors) in computer programs. The first known computer bug was a real bug (an insect) stuck in the electronics.
JavaScript Debuggers
Debugging is not easy. But fortunately, all modern browsers have a built-in JavaScript debugger.
Built-in debuggers can be turned on and off, forcing errors to be reported to the user.
With a debugger, you can also set breakpoints (places where code execution can be stopped), and examine variables while the code is executing.
Normally, otherwise follow the steps at the bottom of this page, you activate debugging in your browser with the F12 key, and select “Console” in the debugger menu.
The console.log() Method
If your browser supports debugging, you can use console.log() to display JavaScript values in the debugger window:
<!DOCTYPE html>
<html>
<body>

<h1>First Web Page</h1>

<script>
num1 = 2;
num2 = 6;
sum = num1 + num2;
console.log(sum);// 8
</script>

</body>
</html>
Setting Breakpoints
In the debugger window, you can set breakpoints in the JavaScript code. At each breakpoint, JavaScript will stop executing, and let you examine JavaScript values. After examining values, you can resume the execution of code (typically with a play button).
The debugger Keyword
The debugger keyword stops the execution of JavaScript, and calls (if available) the debugging function.
This has the same function as setting a breakpoint in the debugger.
If no debugging is available, the debugger statement has no effect.
With the debugger turned on, this code will stop executing before it executes the third line.
var x = 15 * 5;
debugger;
document.getElementById("demo").innerHTML = x;
How to open developer tools in your favorite browser
Chrome
- Open the browser.
- From the menu, select “More tools”.
- From tools, choose “Developer tools”.
- Finally, select Console.
Firefox
- Open the browser.
- From the menu, select “Web Developer”.
- Finally, select “Web Console”.
Edge
- Open the browser.
- From the menu, select “Developer Tools”.
- Finally, select “Console”.
Opera
- Open the browser.
- From the menu, select “Developer”.
- From “Developer”, select “Developer tools”.
- Finally, select “Console”.
Safari
- Go to Safari, Preferences, Advanced in the main menu.
- Check “Enable Show Develop menu in menu bar”.
- When the new option “Develop” appears in the menu:
Choose “Show Error Console”.